
Monday, December 16, 2013
Friday, December 13, 2013
Wednesday, December 11, 2013
Tuesday, December 10, 2013
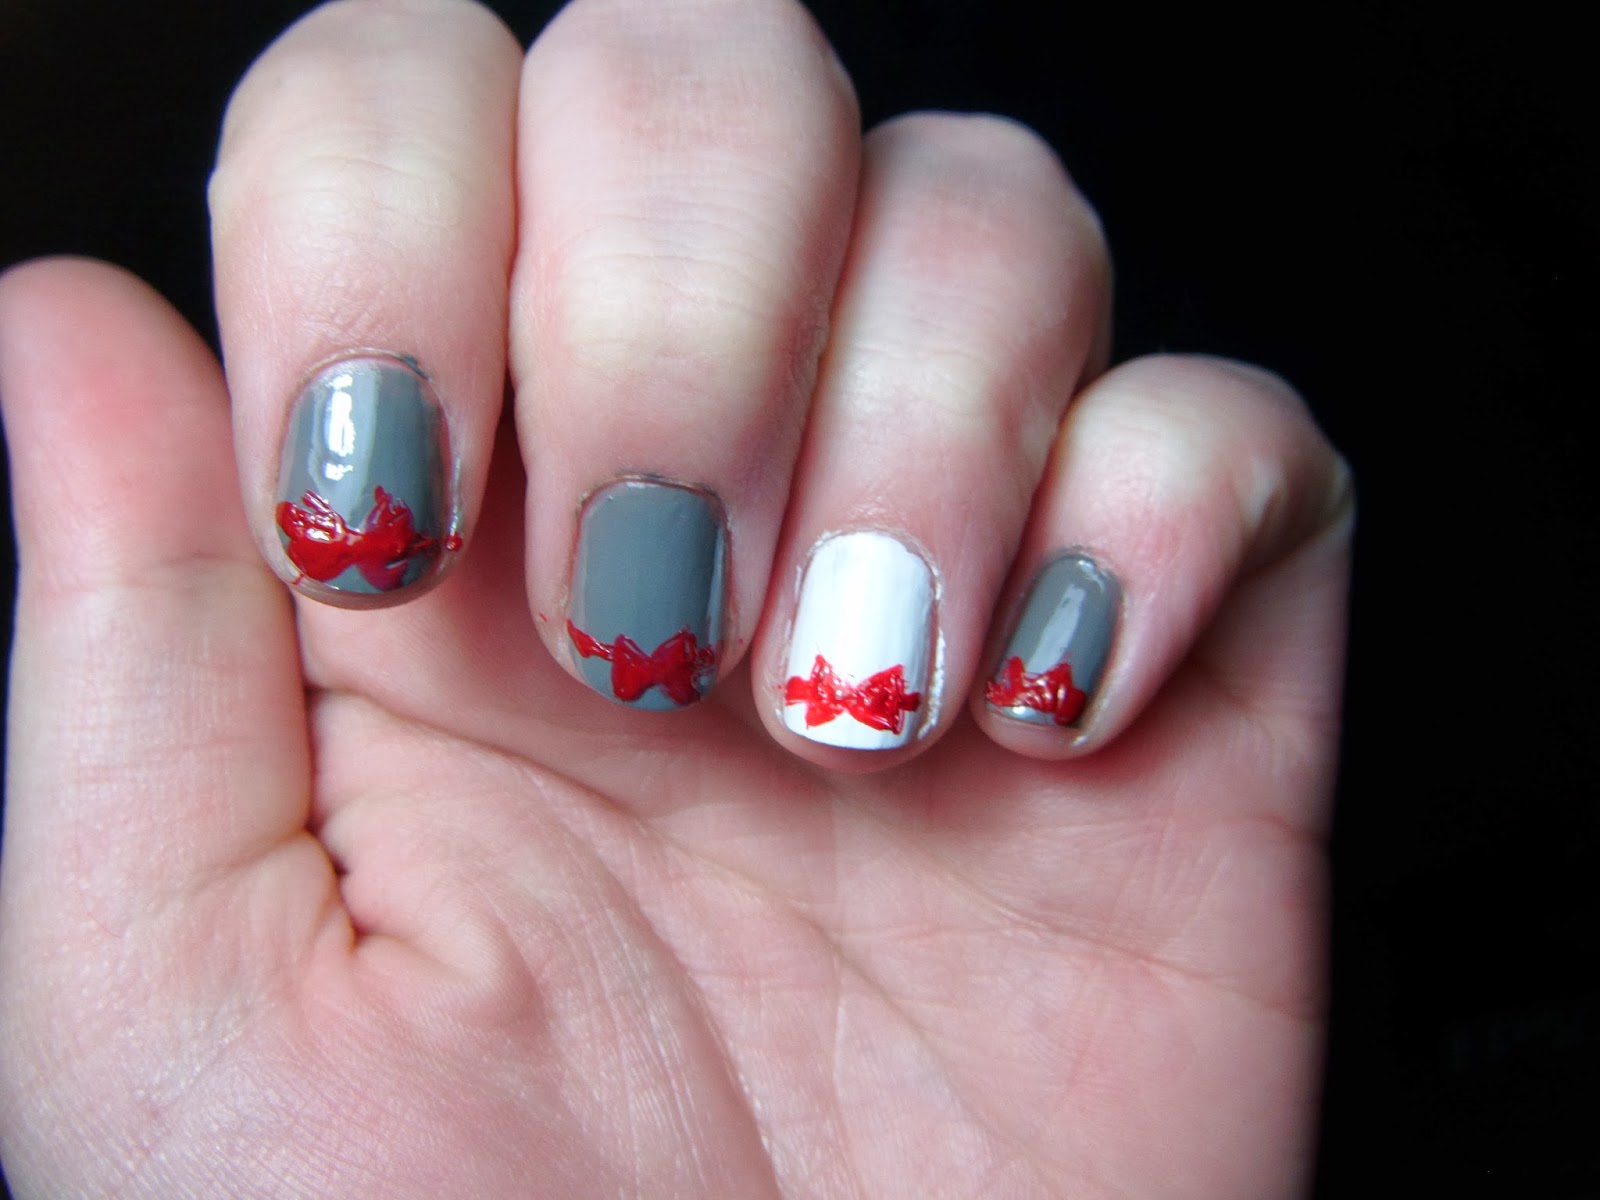
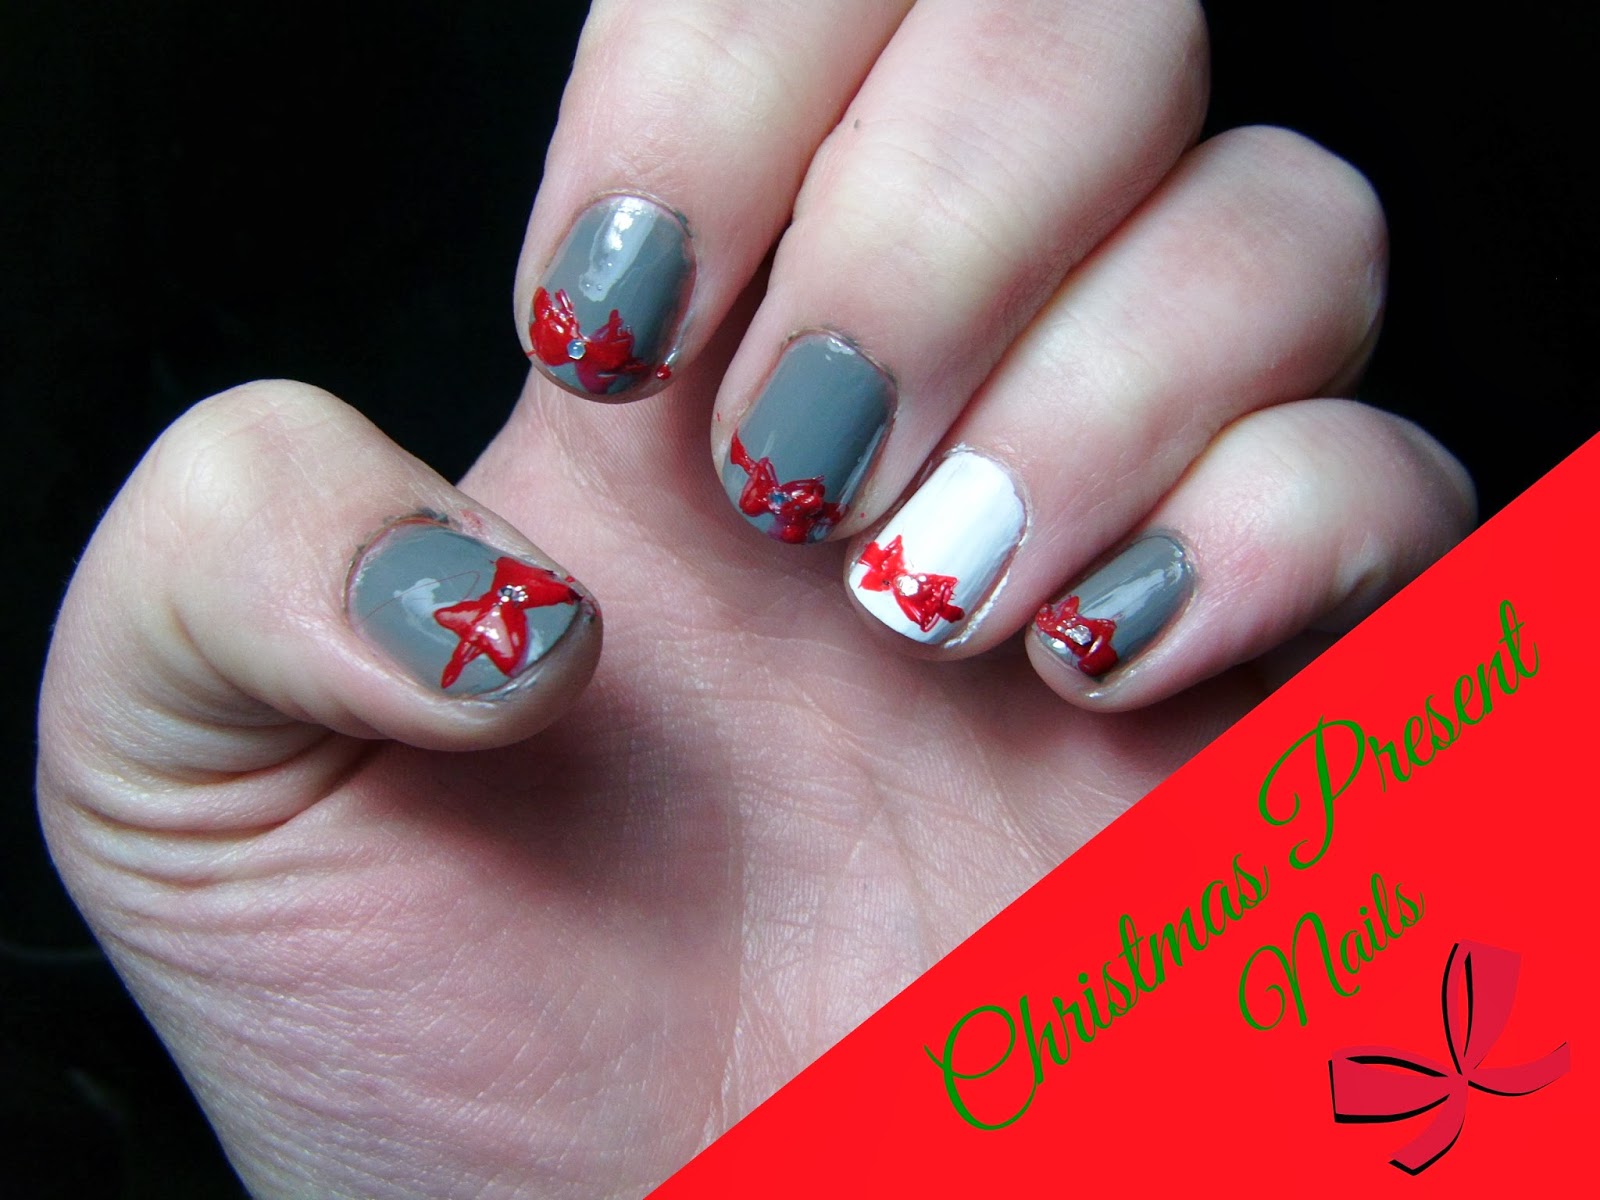
Christmas Present Nails Tutorial
Christmas time is the perfect time of year to dress up a little more than you would, and you definitely don't want to leave out your nails! The normal red and green can get a little boring, so here is my Christmas Present inspired nail tutorial.

A non-shimmer grey polish (I'm using Recycle by china glaze), a non-shimmer red polish (I'm using Valentine by Heaven Nail Lacquer), a non-shimmer white polish (French White Tip by NYC), a silver sparkle top coat with large hexagon/circle sparkles (BCC655 by L.A. Color), and (this one is optional) a gold sparkle top coat (Gold Rush by CG Boundless Color). And of course some tooth picks!

Now paint your ring finger with the white polish and the rest with the grey polish. You can use whatever colors you'd like, this is just how I choose to do it!

Using the tooth pick, dip it in the red polish. Draw lines across your nails about an eighth of an inch from the top.

Now draw an 'x' on top of the line, using the line as the center of your 'x'. Connect the ends of the 'x' and fill in the empty spaces. You now have bows!

Now, using your silver sparkle polish, take a tooth pick and pick up a large hexagon sparkle and place it in the center of your bows. If you want to finish off your nails with the gold sparkle top coat, do that now. I decided against it.

You now have your super festive Christmas Present nails!

A non-shimmer grey polish (I'm using Recycle by china glaze), a non-shimmer red polish (I'm using Valentine by Heaven Nail Lacquer), a non-shimmer white polish (French White Tip by NYC), a silver sparkle top coat with large hexagon/circle sparkles (BCC655 by L.A. Color), and (this one is optional) a gold sparkle top coat (Gold Rush by CG Boundless Color). And of course some tooth picks!


Using the tooth pick, dip it in the red polish. Draw lines across your nails about an eighth of an inch from the top.
Now draw an 'x' on top of the line, using the line as the center of your 'x'. Connect the ends of the 'x' and fill in the empty spaces. You now have bows!

Now, using your silver sparkle polish, take a tooth pick and pick up a large hexagon sparkle and place it in the center of your bows. If you want to finish off your nails with the gold sparkle top coat, do that now. I decided against it.
You now have your super festive Christmas Present nails!
Monday, December 9, 2013
Beauty Buster: Does honey and olive oil really lighten your hair?
This post is the first in the new section of my blog called Beauty Busters. I will take myths pertaining to beauty such as "Does mayo really make your hair shiny?" and do them. Then I'll post them here! I'll take suggestions from Twitter (tweet me @kennyista), Facebook posts, and comments on these posts!
The first myth I will be testing is Does honey and olive oil really lighten your hair? Here's what you'll need:
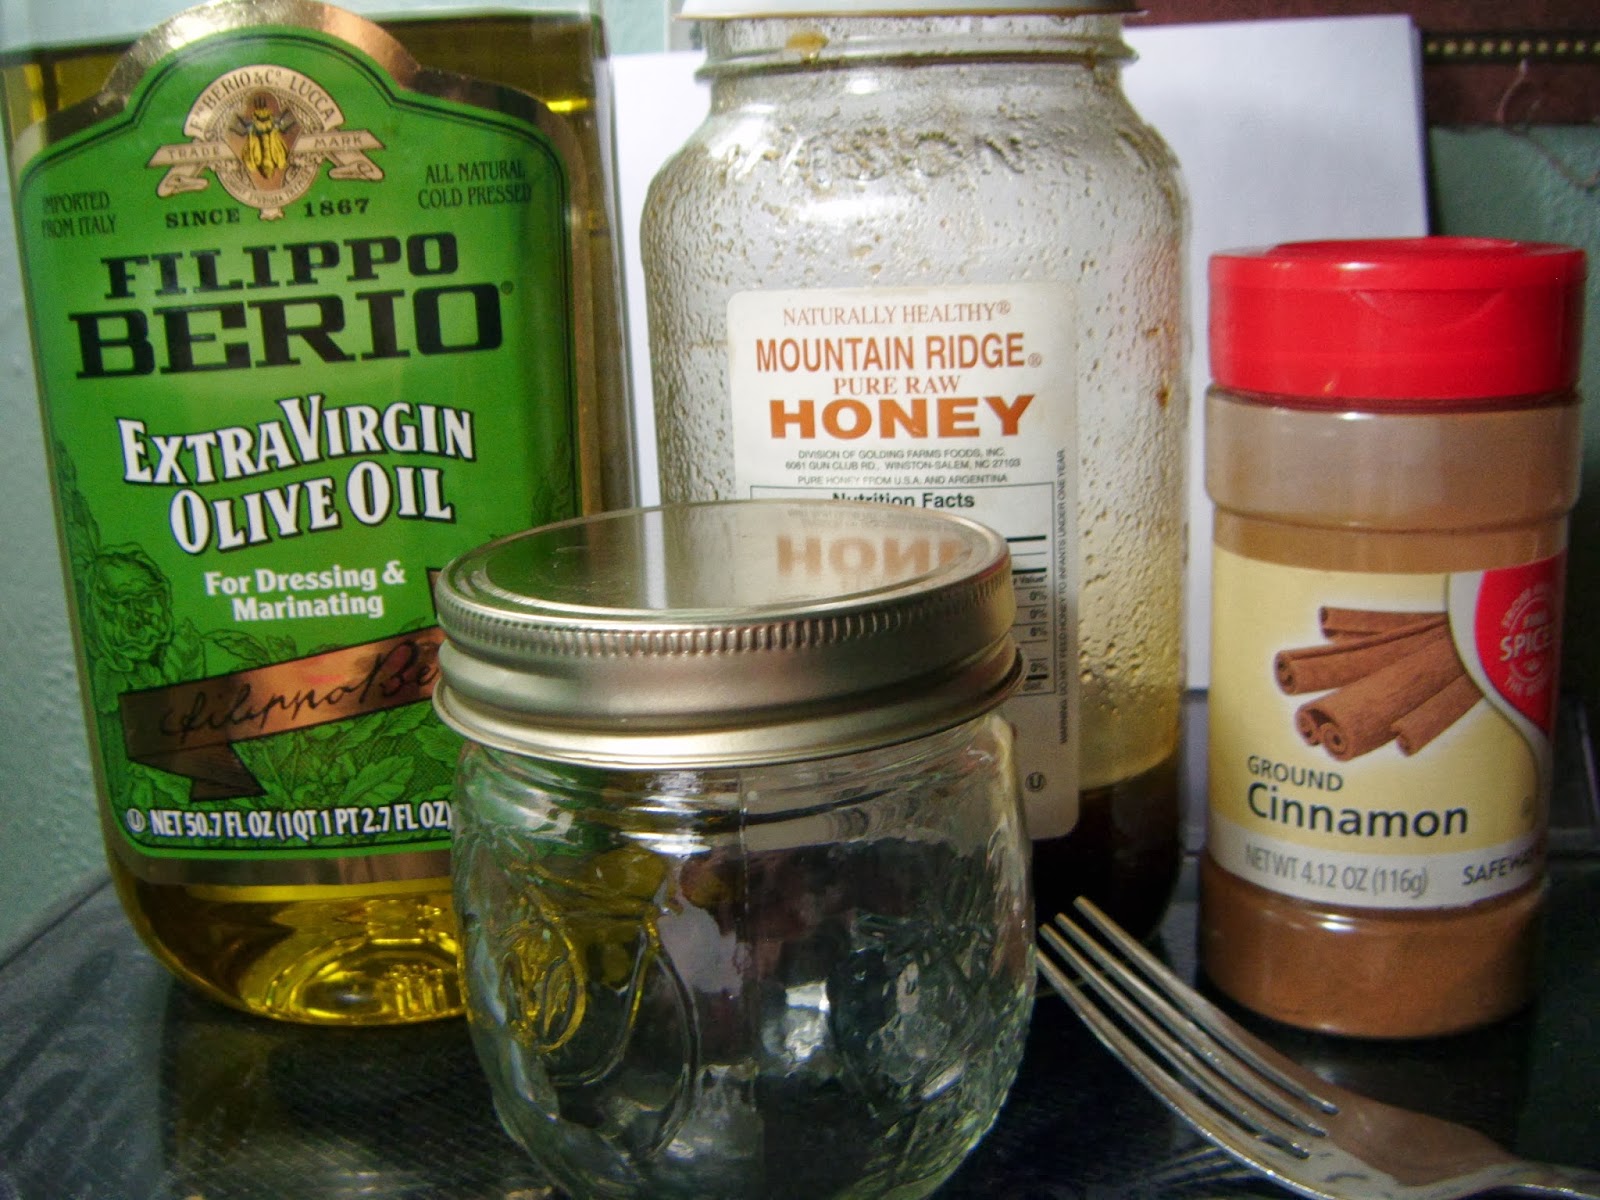
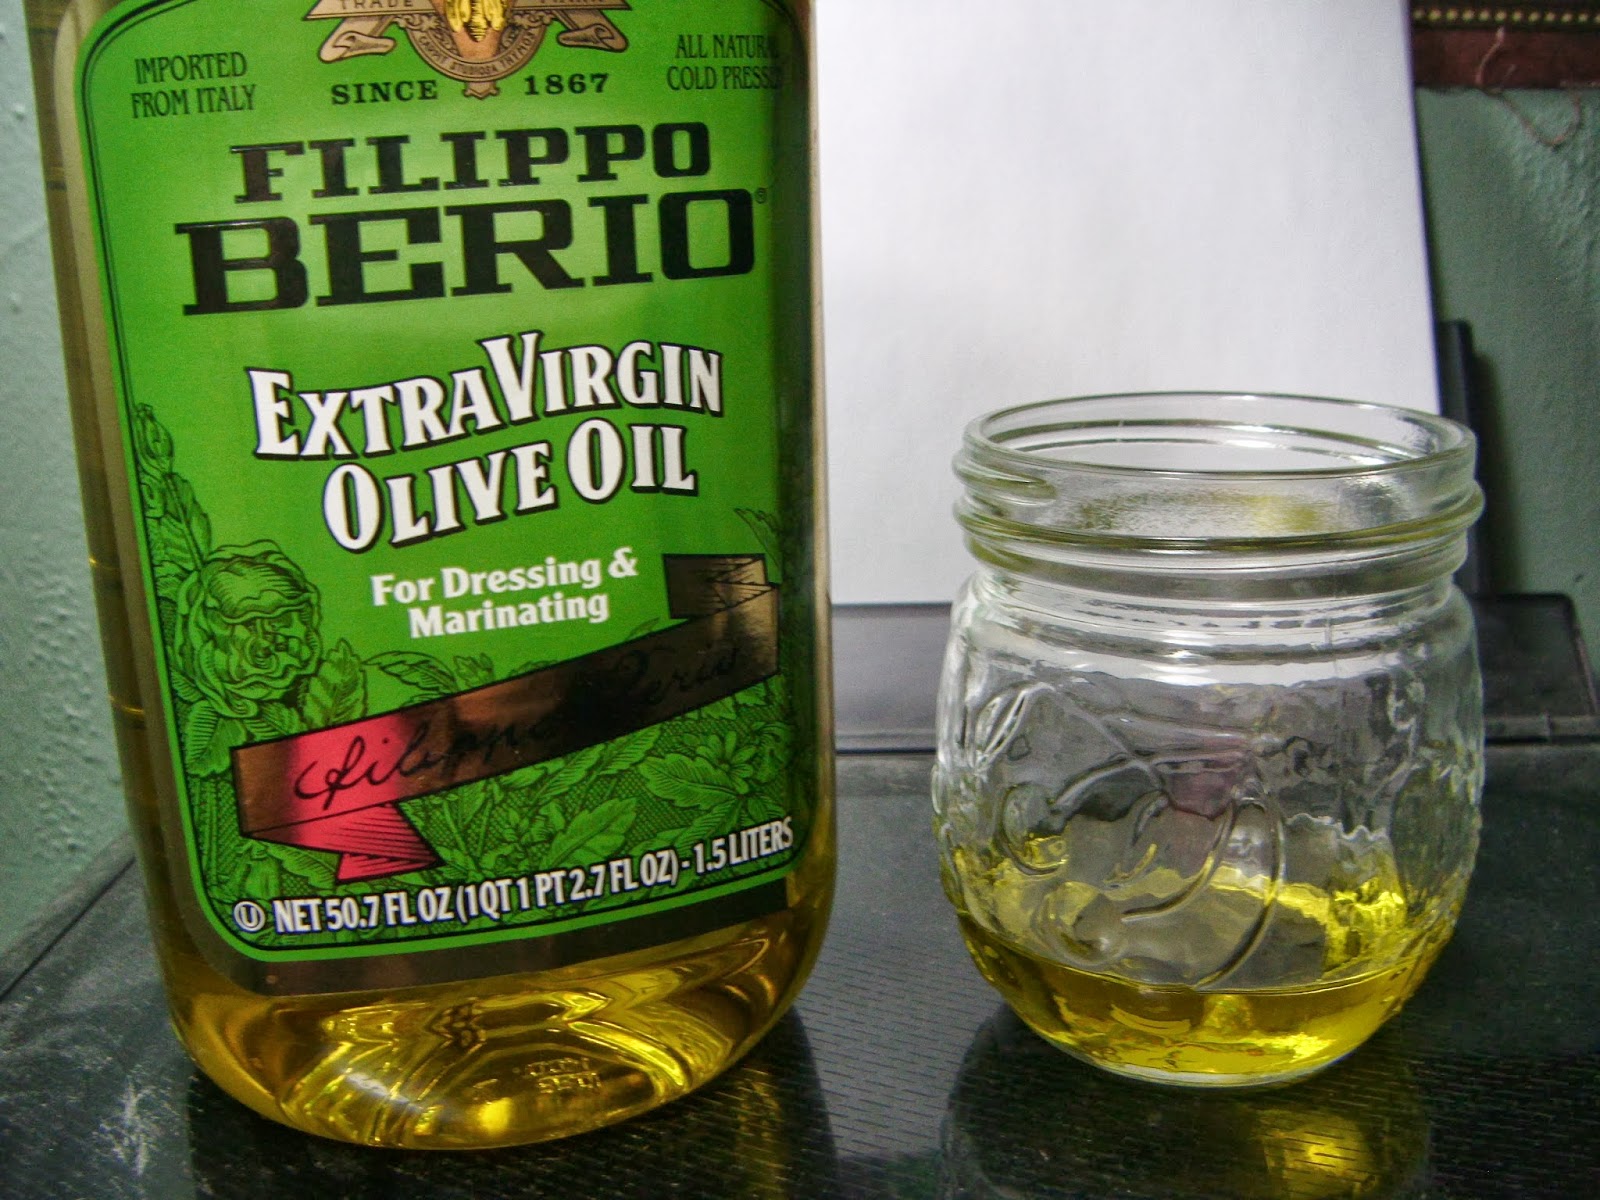
You'll need Olive Oil (I used extra virgin), Honey (raw works best, but you can use any), ground Cinnamon, a jar with a lid, a splash of water, and a fork.

Next put about the same amount of honey in the jar. Small traces of peroxide are found in honey (more in raw honey than in processed honey).

Add a tablespoon of cinnamon to the mixture. Like olive oil, the cinnamon boosts the levels of peroxide in the honey.

Now, add a splash of water. This will thin out the mixture so its not so sticky in your hair. Mix up the ingredients until they are smooth. Put the lid on your jar and let it develop for 10-15 minutes.

Smooth through out your hair, making sure its gets evenly coated all over. Clip it up and let it sit for 30-40 minutes. The longer you let it sit, the more it will lighten. You can leave it in longer than 40 minutes because it doesn't harm your hair! Rinse it out thoroughly (you may need to shampoo 3-4 times).
After I washed out the treatment (I left it on for about 40 minutes) my hair wasn't noticeably lighter, but you could see it a little bit. This process is suppose to be gradual and used frequently. I really like how this treatment makes my hair feel and smell. It does seem to be lightening my hair a little bit. I will have a follow up post to this in a few week, showing before and after pictures and my review and opinions from there.
Wednesday, November 27, 2013
Thanksgiving Make-up Tutorial

For this look, start out with your normal foundation, concealer and powder routine. I use NYC's Smooth Skin Liquid Make-Up in Barely Beige, ELF's double sided Under Eye Concealer and Highlighter, and Mayballine's loose powder in Light.

Next contour under your cheek bones, along your hair line and on your temples with an angled blush brush. This will give your face a more defined look. I used NYC's Smooth Skin Bronzer in Sunny.

Now for blush! Using the same brush you did for your bronzer, apply a Mauve color on your cheeks to give your skin a flushed look.

Using the ELF Under Eye Concealer and Highlighter, apply the highlighter on the top of your cheekbones and gently work it it. This will make your skin glow.

If you normally fill in your brows, do this now. I use ELF's Brow Kit in Medium. First apply the wax with the angled end of the brush to add color and set the hairs where you want them. Now using the fluffy end of the brush, set the wax with the powder.

Eye shadow primer is a great tool to use when you will be wearing your make-up for long periods of time and you don't have to spend a fortune on a high end brand! I use ELF's Eyelid Primer in Sheer. Dot it on the lids then spread it evenly with your finger tip.

Take a spongey eye shadow brush and apply a white shadow to the inner corner/tear duct area and under the brow. This won't be very noticeable, but it will make a huge difference in the end.

Using a normal eye shadow brush, apply a shimmery champagne color all over the lid.

Use the same eye shadow brush and pat a medium brown color on the outer half of your eye to give it some depth.

Using a blending brush, take a matte chocolate brown and apply it in a V shape on the out half of your eye.

Now its time for eyeliner. My favorite liquid liner is Maybelline's Waterproof Ultra Liner in black. With your favorite liquid liner, make a simple winged line.

Once your black liner has dried, take a gold sparkle liner and apply it on top. I used ELF's Liquid Liner in Copper.

Curl your lashes and apply your favorite mascara. For mascara, I used ELF's Lengthening and Defining in Black.

You are done with your eyes! Now for lips. Apply a red lip stain evenly to your lips. I used ELF's Lip Stain in Nude Nectar.

For a little shine and color, apply a sheer brown lip gloss over the top. I used Bath and Body Works Almond Cocoa.

You are now done with your Thanksgiving Make-Up look!
Saturday, November 23, 2013
Midnight Fever Palette by Profusion Review

I was on a hunt for an affordable neutral palette for a while. Over the summer my sister and I went shopping at Ross and I found this palette for about $5! I loved the colors, but I wasn't expecting much considering where I purchased it and how much it was.

Surprisingly, I loved everything about this palette! The colors are very pigmented (even the black, though it didn't show up too well in the picture) and they aren't splotchy. There is a good mix of shimmers and matte shadows, but there are mostly shimmers. The only downside to this pallet is that it doesn't really have a matte highlight color, all the lighter colors that could be used as a highlight are shimmery, and personally I don't like using shimmers as a brow highlight. Overall, for the price of this palette, I am super happy with it and recommend it to anyone looking for a neutral palette.
Monday, November 18, 2013
Sunday, November 17, 2013
Word Camp Denver 2013 Review and Opinion
Today I went to a blogging conference with Ms. Sarah (her website: http://mooseandtater.com) and Roni (her blog: http://happyinaheadlock.blogspot.com/) and it was not what I expected. First off, when we registered online they have you choose your t-shirt size. Surprisingly they had men and woman's sizes. I really liked that because generally they give everyone male shirts. When we got their they only had XXL to M in men's. Also, they only had coffee and water, no snacks. We arrived at 8:30 and were there until about 5:30 with only lunch served. I have never been to some sort of conference or event that was similar that didn't have food! Secondly, with as many sponsor's as the event had you would think that there would be some sort of items given away. The only swag we received were bumper stickers, pens, and pins with the Word Press logo. It was quite disappointing. The first few speakers were a little hard to follow and didn't give us much information. After lunch, the speaker's were great! My personal favorite was Christian Toto (you can find his website here.)
Overall, the day was alright, but I don't think I'll be re attending.
Overall, the day was alright, but I don't think I'll be re attending.
Saturday, November 16, 2013


Thursday, November 14, 2013
Wednesday, November 13, 2013
DIY Salt Spray & Beach Waves Tutorial
Even though its November, luscious waves in your hair are super cute and easy to do! In this tutorial I will be showing you how to make your own salt spray, instead of going out and buying one, and how I get no heat waves while I sleep!

Here's what you'll need: An empty spray bottle (I got mine from the Dollar Store), Salt (In my house we use Himalayan Pink Salt, but any will work), and some sort of conditioner.

First add about a tablespoon of salt to the bottom of your bottle. I just eyeballed it. If you want more texture in your hair add a little bit more, if your hair already has a lot of texture you can add less.

Next add your conditioner. This is to add a nice scent to your hair and to help the salt not dry it out. I added about the same amount as the salt.

Fill your bottle the rest of the way with water and shake very well, making sure to dissolve all of the salt. I would suggest shaking it before each use.

Now for the beach waves tutorial. Spray the salt spray over damp or wet hair after you have combed or brushed it. Now scrunch it up with your fingers to give it a little bit of wave.
Next, divide your hair into two halves. Braid each section down to the tips. Now you can go get some beauty rest!

When you wake up, take out your braids. Your hair may still be a little damp in some spot depending on its thickness and that's fine! Spray a little more of the spray through your hair again, ONLY A LITTLE! Then scrunch your hair to add a little more volume. Use your straighter to fix the roots (if you need to) and the tips (also if you need to) and your done!

Here's what you'll need: An empty spray bottle (I got mine from the Dollar Store), Salt (In my house we use Himalayan Pink Salt, but any will work), and some sort of conditioner.

First add about a tablespoon of salt to the bottom of your bottle. I just eyeballed it. If you want more texture in your hair add a little bit more, if your hair already has a lot of texture you can add less.

Next add your conditioner. This is to add a nice scent to your hair and to help the salt not dry it out. I added about the same amount as the salt.

Fill your bottle the rest of the way with water and shake very well, making sure to dissolve all of the salt. I would suggest shaking it before each use.

Now for the beach waves tutorial. Spray the salt spray over damp or wet hair after you have combed or brushed it. Now scrunch it up with your fingers to give it a little bit of wave.

Next, divide your hair into two halves. Braid each section down to the tips. Now you can go get some beauty rest!

When you wake up, take out your braids. Your hair may still be a little damp in some spot depending on its thickness and that's fine! Spray a little more of the spray through your hair again, ONLY A LITTLE! Then scrunch your hair to add a little more volume. Use your straighter to fix the roots (if you need to) and the tips (also if you need to) and your done!
Tuesday, November 12, 2013
Target Haul (Video)
Hey guys! This is my first YouTube video, so its not the greatest, but I hope you guys like it! Leave your comments below and tell me what you think of the video and if you have tried any of the products I got.
Sunday, November 10, 2013
Dollar Store 5 Minute Hair Removal Kit Review/Tutorial
I was doing some early Christmas shopping at my local Dollar Store this weekend and when going through the beauty aisle I found this Hair Removal Kit.


I have been interested in at home hair removal for a while (such as waxing or a cream like this one), but never really got around to buying a kit and actually trying it. For a dollar there wasn't much to loose!
The directions say to try a test patch and leave it on for 24 hours, but I didn't do that because I am inpatient. It says to apply very thick like so:

It says to leave it on for five minutes, then using the razorless plastic blade they give you to scrap off some of the cream to see if it is all dissolved. The first time I put it on I didn't have enough on, but then I applied more like in the picture above and waited another five minutes. All of the hair was gone! Even though I removed all of the cream with warm water and the razor it left my legs dry and icky. So I jumped in the shower and it was better! No more dry or itchiness.
Overall, I think this product is definitely worth more than a dollar and I will probably be repurchasing it. The only downside is the itchiness afterwards, but rinsing your legs off with warm water and some soap in the tub or shower gets rid of that.
Wednesday, November 6, 2013
3 Easy ways to style hair bows
Sometimes doing your hair can be a chore and in the mornings I don't want to spend more than 5 minutes on mine. Here are my 3 favorite ways to style my hair with hair bows and they take under 5 minutes each!


Here's what you'll need:
- A hair brush or comb
- A few hair ties (preferably ones that match your hair)
- A bow that you want to use (these are DIY hair bows and you can find the instructions here: http://kennyista.blogspot.com/2013/10/diy-hair-bow.html)
- A few bobby pins (optional)

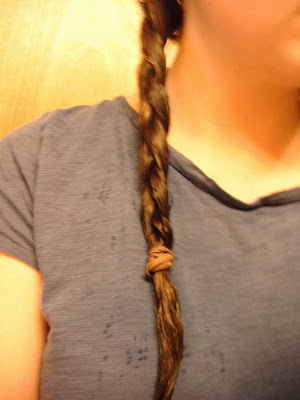
This first style is super easy. Instead of just pulling your bangs back, pull them into a twist and secure them with the bow and you're done.
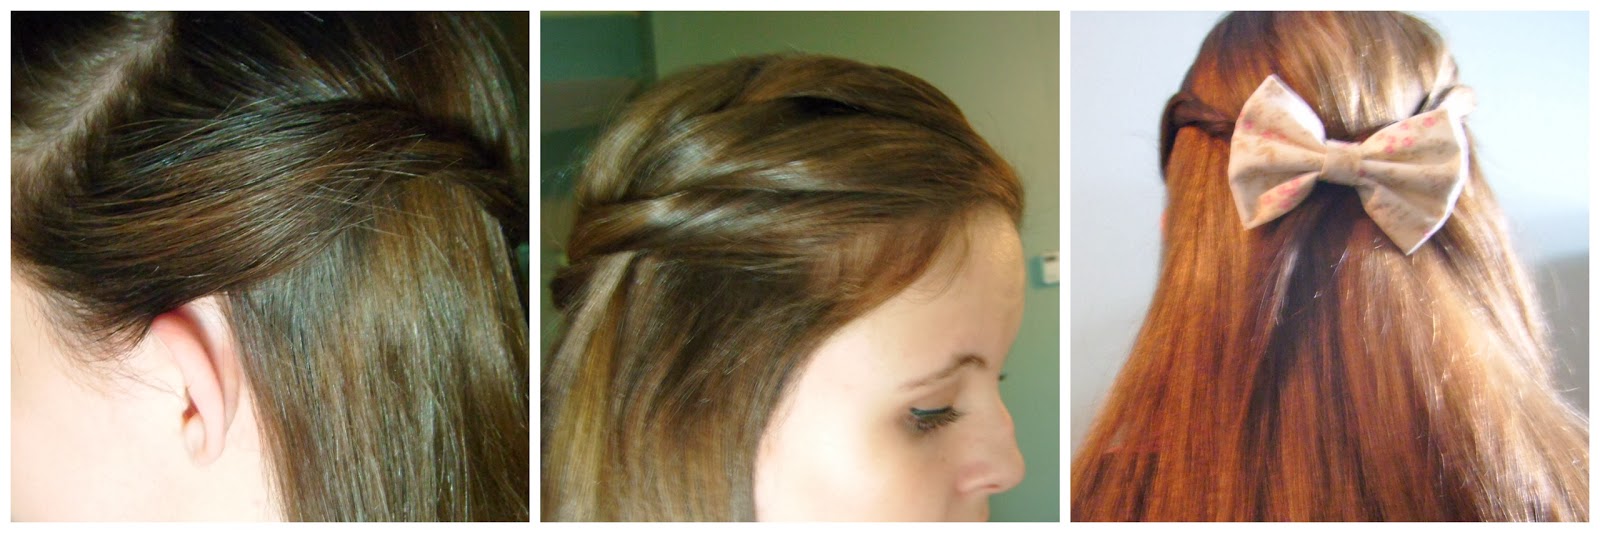
Start out with your hair like the first hair style with your bangs twisted back. Then twist back a small section on the other side of your head. Secure the two pieces in the back with your bow.
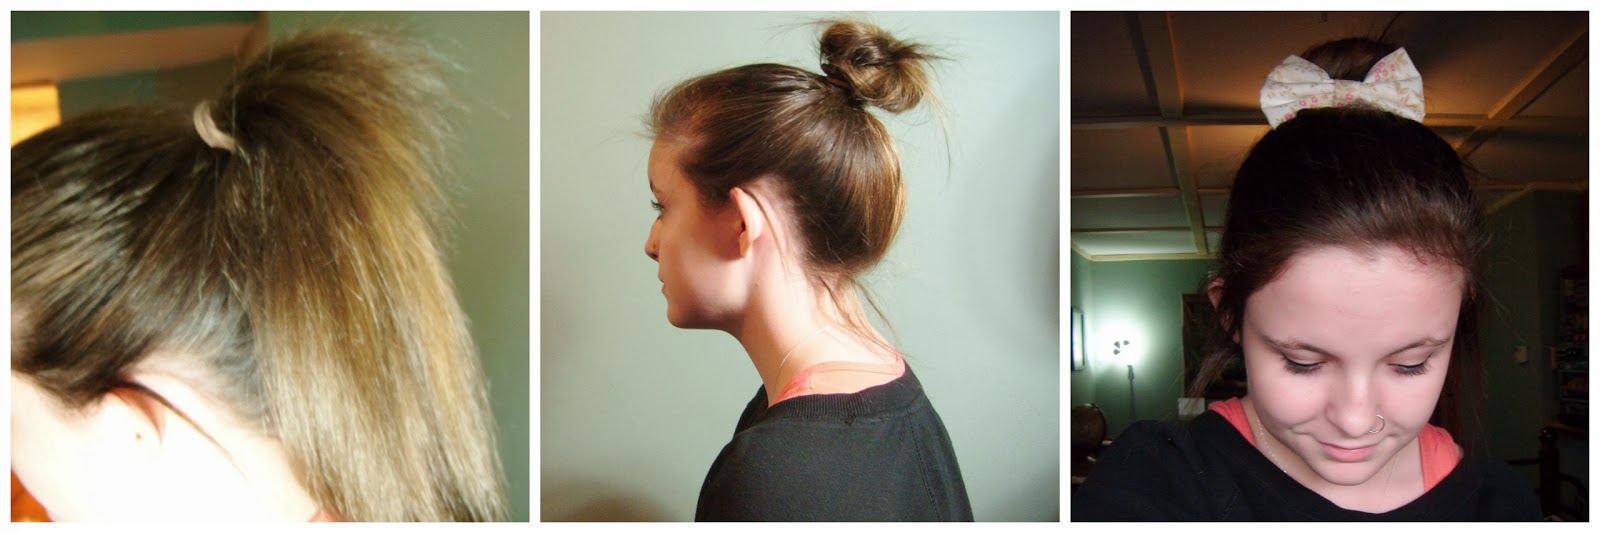
This last one is my take on the trendy messy bun. First pull your hair up into a high pony tail and tease (or backcomb) the base of your ponytail. This will give your bun more volume and fluff. Then wrap your hair up into a bun and secure with a pony tail. Play with it until you get a shape you like. Finally, pull down some of your baby hairs to frame your face and pin the bow in the front of your bun!


Tuesday, November 5, 2013
Outfit of the Day: Preppy

I have been seeing sweaters paired with button up shirts all over Tumblr and finally I have been able to try it. With my sweater/shirt combo I wore leggings under some plain black shorts.

For shoes I wore my go to grey ankle boots. They have a good amount of detailing (the buckles) and they are super laid back and comfortable.

For my hair I pulled it up into a messy bun with some of my bangs pulled out. Then I put a plain white bow in the front.

To stick with the laid back look I did a natural eye look and dabbed on some red chap stick to add a little bit of color to my lips.
Subscribe to:
Posts (Atom)